Setting up SMTP and POP3 email on your iPad or iPhone can seem daunting, especially for non-technical users. However, with a step-by-step guide, you can easily configure your personalized or business email accounts. Below, you’ll find detailed instructions on how to set up these email protocols on your Apple devices, along with examples of popular SMTP servers.
Understanding SMTP and POP3
SMTP (Simple Mail Transfer Protocol) is used for sending emails, while POP3 (Post Office Protocol version 3) is used for receiving emails. When you set up your email account, you’ll need to configure both the incoming (POP3) and outgoing (SMTP) server settings.
Step-by-Step Guide to Setting Up Email on iPhone and iPad
Step 1: Gather Your Email Settings
Before you begin, ensure you have the following information from your email provider:
Email address
Password
Incoming server (POP3) settings
Outgoing server (SMTP) settings
Step 2: Open Mail Settings

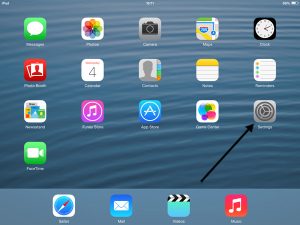
On your iPad or iPhone, go to Settings.
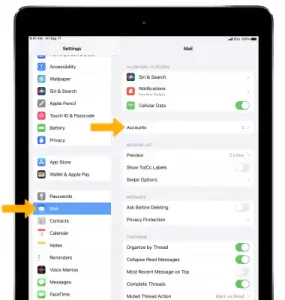
Scroll down and tap on Mail.
Tap on Accounts.
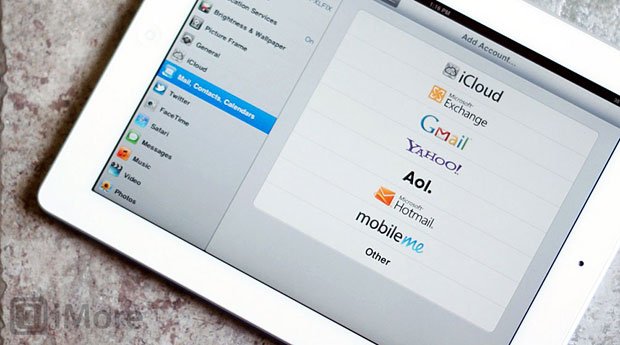
Select Add Account.
Step 3: Choose Account Type

For most users, if you are using a common provider like Gmail or Yahoo, select the appropriate option. For custom domains or less common providers, select Other.
Tap on Add Mail Account.
Step 4: Enter Your Account Information
Fill in the required fields:
Name: This will be displayed as the sender’s name.
Email: Your full email address.
Password: The password for your email account.
Description: A label for this account (e.g., “Work Email”).
Step 5: Configure Incoming Mail Server (POP3)
Under Incoming Mail Server, enter:
Host Name: This will vary based on your provider (e.g., pop.yourdomain.com).
Username: Your full email address.
Password: The same password used above.
Step 6: Configure Outgoing Mail Server (SMTP)
Under Outgoing Mail Server, enter:
Host Name: This will also vary based on your provider (e.g., smtp.yourdomain.com).
Username: Your full email address.
Password: The same password used above.
Step 7: Save Your Settings
Tap Next, and your device will attempt to verify the settings.
If verification is successful, tap Save.
Step 8: Test Your Configuration
Send a test email to ensure that both sending and receiving functionalities are working correctly.
Popular SMTP Servers Examples
Here are some common SMTP server settings you might use:
| Email Provider | SMTP Server | Port | Security |
|---|---|---|---|
| Gmail | smtp.gmail.com | 587 | TLS/STARTTLS |
| Outlook | smtp.office365.com | 587 | TLS |
| Yahoo | smtp.mail.yahoo.com | 587 | TLS |
| iCloud | smtp.mail.me.com | 587 | TLS |
| Zoho | smtp.zoho.com | 587 | TLS |
Troubleshooting Tips
If you encounter issues during setup:
Double-check your username and password.
Ensure that the server settings match those provided by your email host.
If SSL/TLS connections fail, try switching ports or disabling SSL temporarily to test connectivity.
By following these steps, you should be able to set up your personalized or business email accounts on your iPad or iPhone with ease. Enjoy seamless communication right from your Apple devices!


